react-unity-webgl을 활용하기 앞서 React 프레임워크에 Unity 콘텐츠를 퍼블리시 해보자.
01. WebGL Build Support 설치
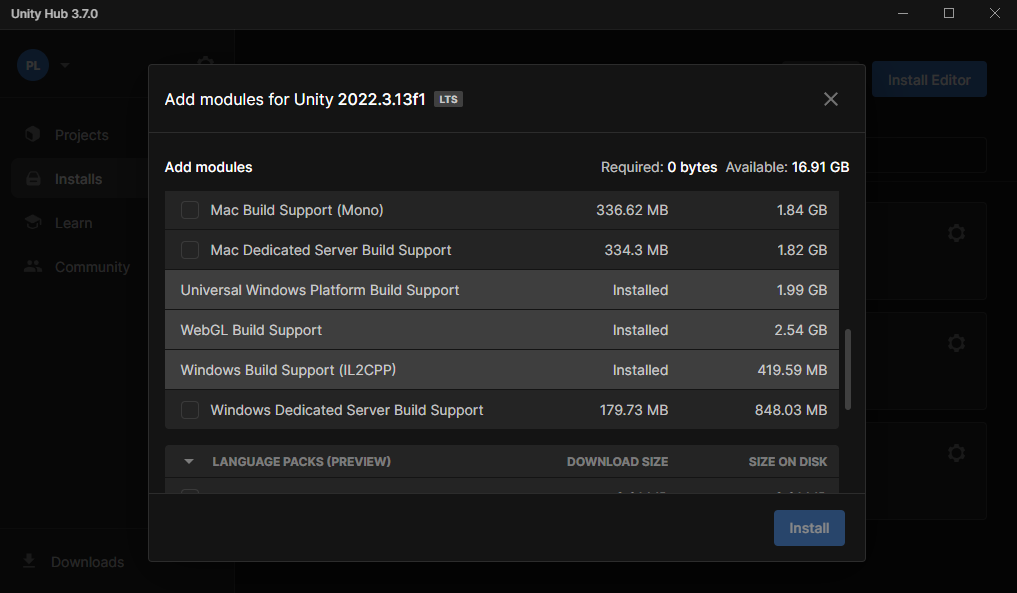
Unity 에디터 설치 시 WebGL Build Support 설치해줘야 한다. 설치 안했다면 추가로 설치해주면 된다.
02. Unity 프로젝트 WebGL로 빌드

WebGL Build Support 설치하면 다음과 같이 프로젝트 빌드 시 WebGl로 빌드할 수 있다.
03. React 프로젝트에서 Build 파일 붙여넣기

Build과 완료되면 Build -> Build 풀더에서 다음과 같이 파일 들이 생성된 걸 확인 할 수 있다.
(폴더명과 파일명이 다를 수 있으니 이 점 주의해야한다)
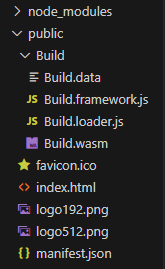
React 프로젝트에서 Build 폴더를 하나 만들어 생성된 빌드 파일을 모두 복사하여 붙여주면 된다.
04. React에서 Unity WebGL 실행
import React from "react";
import { Unity, useUnityContext } from "react-unity-webgl";

function App() {

  const { unityProvider, sendMessage, addEventListener, removeEventListener } =
    useUnityContext({
      loaderUrl: "Build/Build.loader.js",
      dataUrl: "Build/Build.data",
      frameworkUrl: "Build/Build.framework.js",
      codeUrl: "Build/Build.wasm",
    });

  return (
    <div className="App">
        <Unity style={{
            width: '84%',
            height: '100%',
            justifySelf: 'center',
            alignSelf: 'center',
        }} unityProvider={unityProvider} />
    </div>
  );
}

export default App;
App.js에 다음 코드를 넣어주면 성공적으로 Unity WebGL을 웹 브라우저에 퍼블리시 할 수 있다.
다만, Url 경로를 써 줄 때, Build 폴더에 있는 파일명 이름을 똑같게 해주야 한다는 점을 주의해야 한다.

코드는 다음 링크에서 자세하게 확인 할 수 있다.
https://react-unity-webgl.dev/
React Unity WebGL
Bringing your Unity Games to the Web since 2017!
react-unity-webgl.dev
'프로그래밍 > WebGL' 카테고리의 다른 글
| [WebGL] Unity WebGL InputField 한글 입력 (0) | 2024.01.20 |
|---|---|
| [WebGL] Unity에서 React 통신하기 (0) | 2024.01.20 |
| [WebGL] React에서 Unity 통신하기 (1) | 2024.01.20 |
| [WebGL] react-unity-webgl 소개 (0) | 2024.01.20 |


